A geolocation redirect attempts to find the physical location of a web visitor’s IP address and redirects them to an URL depending on what geographic region that location falls within.
- Regions are the list of geographic areas. Typically each region is associated with a different URL and users determined to be located within that region will be sent to that URL.
- The map view defines the regions as shapes on a map.
Regions
To edit, add, or remove a region from your redirection, find the regions section within the channel you’re trying to edit. You will see a list of regions.

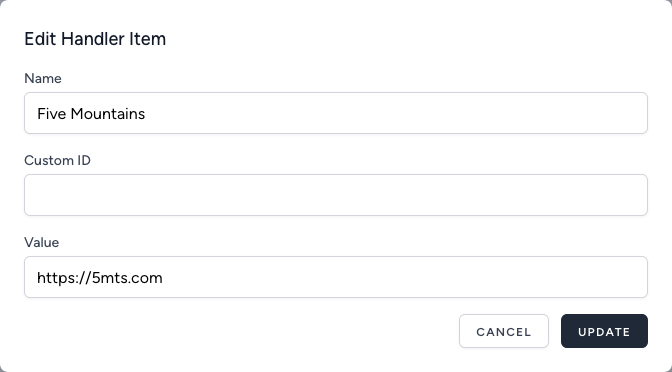
- Name is an administrative label to identify the region
- Value is the URL that visitors within that region will be sent to
- Other settings are currently unused
To add a new region, click the “create item” button in the upper right.
To edit the name or redirection URL of an existing region, click the “edit” button (“custom ID” is currently unused).
To delete a region, click the “delete” button at the right side (this will remove it from the map as well).
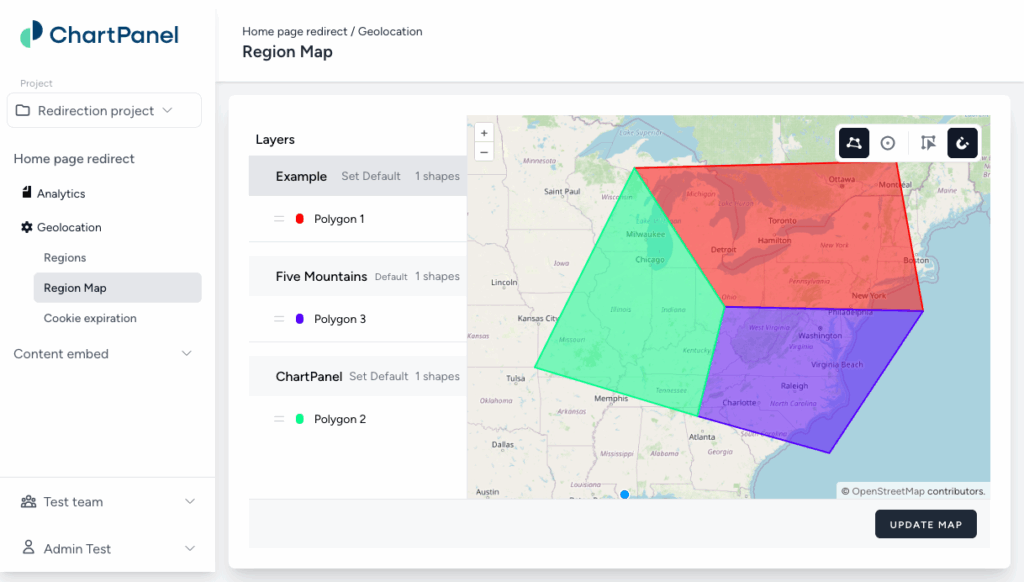
Map
To set or change the geographic area within which visitors will be sent to a given URL, find the map setting in the left in the channel you are trying to edit.
You will see a list of “layers” corresponding to the regions you set up in the regions setting. Each layer or region can have any number of shapes within it.
Adding shapes to a region
To create a new shape defining a region, select the region in the “layers list” (it’s background will darken to indicate it is selected). If you need to add a totally new region (i.e., a new redirection URL), do so in the “regions” section as described above.
Then choose one of the drawing tools from the toolbar in the upper right:
![]() Polygon: any number of points with straight lines between them defining the area
Polygon: any number of points with straight lines between them defining the area
![]() Circle: a center point with a defined radius around it
Circle: a center point with a defined radius around it
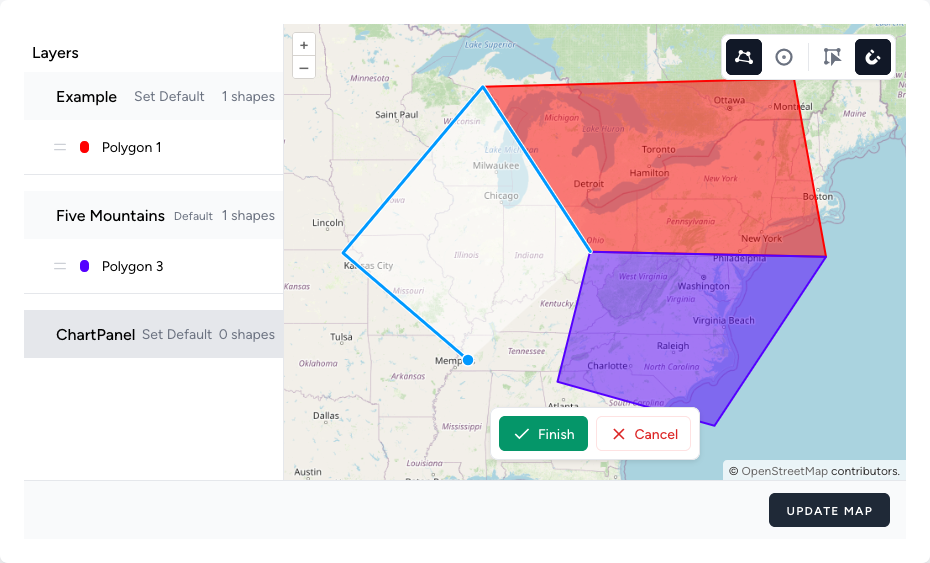
Draw with the blue line. When you are finished with the shape, finish it by double clicking or tapping the “finish” button.
Editing shapes
To edit a shape, do one of the following:
- Click its name in the “layers” list, or
- Enter edit mode by selecting the edit icon
 on the toolbar and then click on the shape in the map area
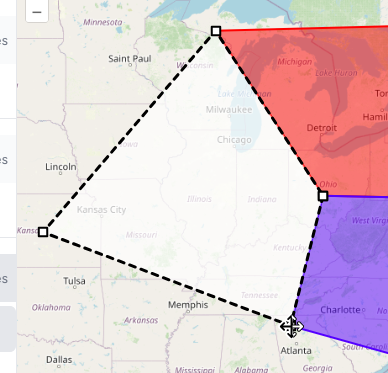
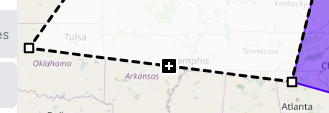
When you are editing a shape, it will have a dashed border. You can:
- Move a vertex (or corner) and by clicking and draging it
- Add a new vertex by clicking on a line between vertices (hover your mouse over the line to see a plus symbol on the line where the new vertex will be added)
- Delete a vertex by option-clicking it (Mac) or control-clicking (Windows).
Other settings
- Rename a shape by clicking on its name in the layers list
- Move a shape to another region in the layers list by clicking the drag handle (horizontal lines) to the left of its name
- Delete a shape by clicking the trash can icon to the right of its name when you hover over it in the layers list
- Snap mode on the map can be toggled with the magnet icon
 , which determines whether vertices will snap to the same position as existing vertices when drawing or moving vertices (useful for ensuring that the edges of shapes exactly meet up with each other).
Save
When you are finished editing the map, apply your changes by clicking the “Update map” button at the bottom of the screen.
